Tuesday, December 22, 2009

Christmas Freezer Paper

Freezer paper stenciling creeped into my Christmas decorations...


and I couldn't be happier :)

Here are some more detailed instructions--this was my first attempt to take pictures with every step, so sorry I don't have all of the pictures:

1. You need freezer paper. :) The only place I found it was Wal-mart; next to the tin foil. Cut out a small square/rectangle/circle to cover your idea and onesie; do this three times per onesie. Set two aside until you're ready to iron.

2. Now's the time to put your design on the paper. I usually make my designs in word, publisher, or acrobat, print it out on regular paper and trace it to the freezer paper. (The reason freezer paper can do this is because it has a light adhesive on one side of the paper and it bonds to your project when heat is applied). The adhesive side feels grainy; it's the side that will face your onesies. Trace your design to the SMOOTH side of the paper.

3. Next is the cutting. Use masking tape to keep your design from moving around the cutting surface (I usually use a spare piece of cardboard---diapers' boxes work real well). Think about what areas you want the color of the paint and color of the onesie; cut out the most intricate parts first and remember to save the small pieces needed for white spots (like the middle of an A).
4. Set the iron to cotton/wool; basically you just want to make sure the iron isn't on steam. First, take the second full piece of freezer paper and iron it to the inside of the onesie with the grainy side facing up toward you; this keeps the paint from leaking to the back of the onesie. Check to make sure it's stuck to the onesie.

5. Then, iron your cut-out to front. Iron from the biggest to smallest piece. It takes a couple of seconds for the paper to bond to the fabric. Just make sure it's on there well; be careful not to touch it too soon or you'll get a nice heat shock.

6. Paint. I use an up-and-down motion just in case the paint seeps. Let it set for a 15 20 minutes, then paint another coat.
7. After the paint in fully dry---I usually give it a couple hours---take the stencil off and iron the other full non-cute freezer square on top of the new painted design (this seals it and keeps it from coming off in the wash). Wait for the paper to cool and peel the inside and outside paper off.

Congrats---you've successfully made a new onesie and have become addicted to a cheap and easy way to vamp up kids' clothes--or Christmas stockings!

Thursday, December 17, 2009

Hair Clips & Holder

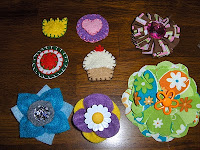
Before 'Princess' was born I went a little crazy making hair bows (a girl can never have too many) and all of these pictured went to VT sister who also recently had a girl, so I don't feel too bad for making so many:

Exhibit A

Exhibit B

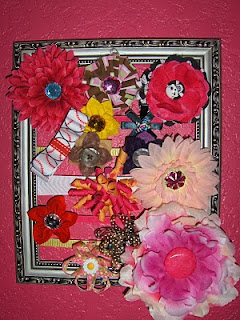
Since I made so many bows, I needed to make a place to put them. Enter Exhibit C:

Here's what you need:

an old frame, ribbon and a glue gun---That's it!

Strip the old frame down. Throw away all the photo backing stuff and use pliers to take out the little metal pieces. Then flip the frame over and lay out your ribbon. Glue the free end to the frame, pull tight then cut. Glue the other end of the ribbon. Continue gluing ribbon until you reach the end. Then put the bows on the holder and hang it up for the world, your kids, to see.

Monday, December 7, 2009

Once There was a Snowman...

This is the latest addition to the Christmas decorations. I knew that I wanted to make a snowman originally thought of giving him the traditional top hat. But when I was over a Nett's this weekend there was this tiny hat on the fireplace. She had no idea where it came from and I thought that it would be perfect for this guy. I started making him at Nett's and showed it with the hat on. She thought it was cute, so I kept going. I don't think I really ever asked if I could use it though... Sorry about that, Nett. If it's not o.k. then I can crochet it another hat. ^^; I guess I was excited to make it... Anyway, he's about a foot tall without the hat on. The more I look at it I wonder if I should have tried to do something else than the snowflakes at the bottom. Oh well. I guess if I end up not liking them then I'll change it

Thursday, December 3, 2009

Christmas Advent Calendars

Last Christmas season, I felt a overwhelming desire to create more family traditions, so we can have them established 'as long as the kids can remember.' One things I like a lot about Christmas time are Advent Calendars, so I made two.

I spent most of January making this one:
(Click here to get the instructions). UPDATE 2011: The link has been taken down, basically it's a piece of duck cloth, a lot of felt, glue & cutting. Here's a magnetic version from {Say It On The Wall}

If you can't tell, it is Joseph & Mary travelling to the stable over the month of December; once they get there baby Jesus is placed in the stable. I made one for us and one for our dear friends. I also taught a class last month (a couple days before little princess was born actually) to fellow women for their families.

I spent March & one May day to make this one (tutorial found here):

Each day has a Christmas related activity in it. The kids will pull it off in the morning and then we'll do the activity some time that day. Activities include: Christmas Tree Campout, watch Christmas movies, make cookies and give away, etc. I spent time looking for ideas and picked our top 25. Over the years, the activities will rotate days. Some activities are too old for my kids so we'll probably just color and watch old Christmas specials on those days.

All in all, I was really excited to make these and now I'm really excited to use them this month! Now, get crackin' all and create a calendar for your family--- it's not too late!

giveaways