Monday, March 15, 2010

Girly Nursery

We finally finished our little girl's nursery and I have to say, it's one of my favorite rooms in the house. I think I love the kids' rooms and downstairs because they're all painted. So---here's the rundown on what I did.

First off---I found fabric I wanted to use in her room. From the fabric I pulled the two paint colors: a light pink and fuchsia-type pink. Then we painted. :)
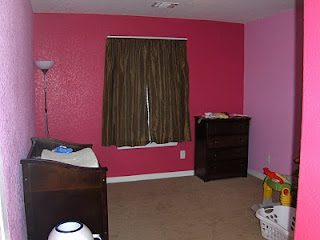
Second---One the long light pink wall, where her WHITE crib is we painted circles to frame the letters of her name. Don't know how to paint circles? Find a bowl in your kitchen in the size you want and use a pencil to trace it on your wall. Then paint--- it's that simple!
Third---On the window wall I made inexpensive art and the valence for the window. I got plain wood embroidery hoops, stained them the dark brown. Then I put some of the fabric in the hoops used Fabric-Tac to glue them to the inside of the hoops and had three pieces of art for my little girl's room.
Close up of some of the hoops.
Fourth--- I made the mistake of buying wall stickers at Target thinking they'd work on textured walls. They don't. Within a day, almost all of the stickers fell off. To feel as though we didn't waste any money, I found three cheap panoramic frames and put the dots on the plastic outside of the frame. I never took a picture, but if someone really wants to see it---I will. I don't know if I like it enough to keep it in the room.

Fifth--- To finish it off--- THIS and THIS are on the little wall, right next to the closet. Overall, I'm really pleased with how everything turned out, but I'll take a little more time to think things through before I move onto the Knight's bedroom.

I used lavender and light green to accent with dark brown and white furniture.

Wednesday, March 10, 2010

Quick 'n Easy: St. Pat's Decor

So I made this in a little over 30 minutes the other day and I LOVE how it turned out.

All you need is: thin canvas, dark green acrylic paint, scrap green fabric, a little bit of ribbon and mod podge

1--Paint the canvas
2--While canvas is drying cut out shamrock leaves using a heart clipart
3--Mod Podge the leaves
4--Glue ribbon to the back of canvas
5--Hang and Enjoy!

giveaways

Monday, March 8, 2010

Alice in Wonderland Charms

I was a silly person and stayed up really late last night to make these. The idea came and I couldn't stop thinking about it. So I just went ahead and made them. I decided to use different colors of polymer clay so I wouldn't have to do the painting step. This morning I finally glazed them after doing all of my homework. I think that they all turned out pretty well. I thought of making the Cheshire Cat's mouth more prominent but I thought that would make him stand out too much from the others. What do you think of them?

Friday, March 5, 2010

Past Craft: Heart-felt Baby Toy

Sorry about the absence, my mommy duties have outweighed crafting because of a sick boy. :(
I'm only getting half of things done, so I thought I'd show off something I made last month.

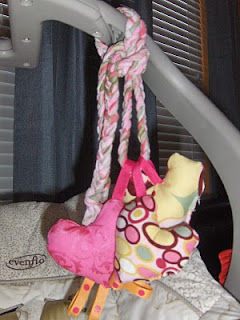
I used the tutorial {HERE} to jump off of and created these for my daughter for Valentine's Day:

They are really simple and she's already had them in her mouth a few times.

All you need is: scrap fabric, ribbon, stuffing, extra jingle bell, krinkly plastic (from disposable wipes container and sewing notions.

I put the bell in one, the plastic cut into pieces in another, and put ribbons on the outside of the third. To connect them, I cut three long strips of a jersey fabric and braided them together. The ribbon also make it so they can connect to a playyard as well.

They may not be perfect, but I made them for her---and that's what counts.