Showing posts with label kids. Show all posts

Friday, October 1, 2010

Trick or Treat Bag

I meant to create this bag for my son a year ago--- but with being 8 months pregnant and moving into our new house it took a back seat. This year is different! Here's a simple and fun way to make the kiddos in your life their own Trick or Treat bag!


Supplies:
  • 1 yd of two coordinating Halloween fabrics (if you just want to make the bag get 1/2 yard)
  • 1/4 yd heavy weight iron-on interfacing
  • Halloween-y thread
  • Sewing Notions
Instructions:
  1. Cut out your pieces. You'll need 2 of everything in both fabrics. 12" x 7 1/2" (LARGE) rectangle, 12" by 3 1/2" (SMALL) rectangle, and 1 1/2 x 19 1/2 for the straps.
  2. Pair opposite fabric straps to each other and sew along both 12" sides with 1/4" seam allowance. Turn inside out, press and sew finishing stitches along each 12" side again. Set aside.
  3. With RIGHT sides together, pin one L rectangle to one S rectangle along a 12" side. Do with all four pairs. Sew together. You should now have four large squares.
  4. Press out, then cut two pieces of interfacing to match size of your two outer squares. Press to bond interfacing. Then sew a finishing stitch just above second fabric (pictured in last photo).
  5. With right sides together, sew the similar squares together. DO NOT sew around the top. Outside to outside and lining to lining. Leave a 3-4" gap at the bottom of the inside lining fabrics. (My hole was a bit to small).
  6. OPTIONAL: If you want your bag to stand, match side and bottom seams to form a point. Sew a straight stitch 1" down from the point. Double stitch for added strength. Trim off the point and repeat for three other corners. (FYI: this is call Mitre corners).
  7. Now it's time to put it all together. With the WRONG side OUT on the outer fabric, pin the straps 3" from the seam. I did matching fabrics facing each other, but you can do opposite. That's the beauty about this bag!
  8. Turn inner lining RIGHT side OUT, tuck inside the outer fabric. The right sides should be together. Repin straps through the lining too and stitch along the top of the bag.
  9. Pull bag right side out through the opening in the lining, arrange the bag, press and complete the bag with a finishing stitch!
  10. Don't forget to hand stitch the opening in the lining. I did and remembered a few days later. I was just too excited to give the bag to my little boy!

You're done. Now all you have to do it convince your little trick-or-treater not to carry in around the whole month of October! Good Luck!

Do you recognize the fabric? I used the extra to make my pumpkins and will finish off the coordination with a table runner!

I'm using this tutorial as an entry for this... wish me luck! Hopefully, I'm chosen!


Wednesday, August 11, 2010

Fast 'n Easy Hooded Towels

A couple nights ago---for thirty minutes TOTAL--- I made these for my kids:

Hooded Towels!

All you need is: one large towel, one hand towel, matching thread and sewing notions.

I mostly followed {THIS} tutorial from {Make 'n Takes}.

MY CHANGES:
I (my husband) ripped the seam out of the top of the hand towel and that's where I sewed for the top of the hood. Then I pulled opposite corners together and sewed across the top to create a flat top---instead of a pointed one.
I also sewed right sides together since I had a raw edge.
I used the leftover half to create the first letter of each of my kid's names.

The finished project is really large on a toddler/baby, but they'll grow into it. And, what a perfect baby shower gift for all of us who have expecting friends (and even the older siblings too)!

Really easy, really fast and now my kids have towels that aren't ones we've been using since our newlywed days.

Friday, June 11, 2010

Toy Car Caddy

One of the things we made this last month was a group of these:

Toy Car Caddies

My little knight had a birthday and had friends who had birthdays, so I knew when Meg came in town we had to use some of our craft time to make these for the boys.

We used the tutorial {HERE} at {Homemade by Jill}. Funny thing is we grew up in the same stake together and it's really cool to see all the things she's created.

A couple things we did differently:
  • used yellow ric-rac as the road divider instead of little rectangle pieces.
  • Instead of the car applique (which is way cute) we used some leftover Radiator Springs postcards we printed on fabric for my son's birthday party.
  • We used regular weight fabric for the car pockets and it turned out just fine.
  • Once we got to the third one, I realized the dimensions need to be increased if larger cars were to ever fit in the pockets (like Mater and the Tractor from Cars). So, instead of using Jill's dimensions on the third one, these are the ones I used: 19.5 by 10 for the whole thing, 19.5 by 6 for the car pocket fabric, 19.5 by 3 black felt strip for the road. When you create the pocket width, start from the middle and make the two middle pocket 3.5 inchs wide instead of 2.75 inches wide.
The feedback I've gotten is good; all of the boys love their carriers. Here's my son enjoying his on a long car ride home. And you can bet we'll be taking it when we travel at the end of the month.
If you have a little boy in your life and minimal sewing skills, making one of these is a MUST!

Wednesday, April 21, 2010

File Folder Games

During my absence, I spent a week of my crafting time doing making these:


File Folder Games!

They're really easy to do!

What you need:
  • Manila file folders
  • computer and printer
  • coloring tools--- I used crayons and pencils
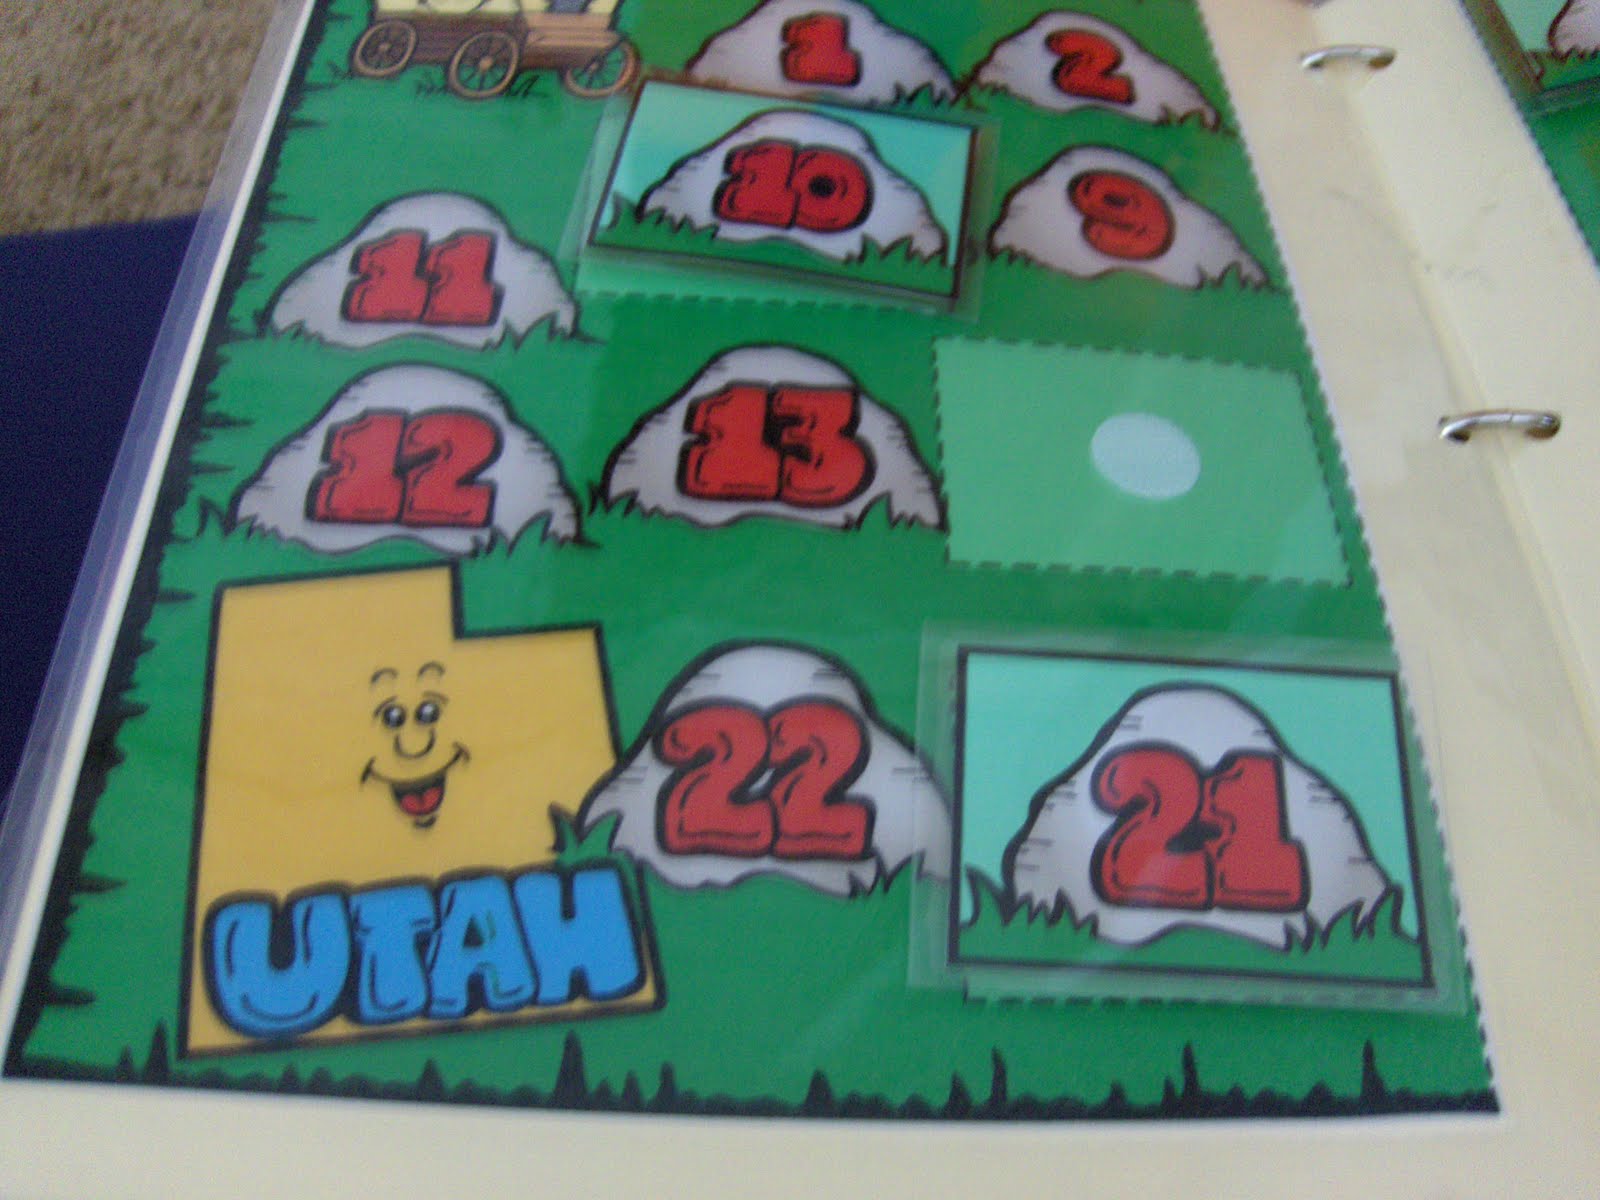
  • buy (or find a friend who has) a book full of games. I recommend {Finch Family Games}. Each book comes with a CD; so you can choose to color the games in yourself or print out colored versions. This is the book I bought:Sticky Velcro circles
  • scissors
  • Three-ring binder, two inches wide
  • binder clips

Some hints/tips when making file folder games:
  • Use the colored-in version of the games, if you can't color for a long time. Personally, I colored half of mine in and printed out the other half. Here's a close up of one of the ones I printed out pre-colored:
  • If you take your game to get lamintated (which I recommend), cut down the folder before adhering the game to it. It'll save you time at the print center.
  • Also, leave space in the middle crease so you can hole punch the game after lamination.
  • Since you hole-punched your games, store them in a three-ring binder. I bought a two-inch binder (it fits about ten games and pieces).
  • Home laminate the game pieces. You can use clear contact paper (about $5 for one roll), self-laminating sheets, or a home laminator. All reasonably priced.
  • Use binder clips to keep pieces with the correct game. It also comes in handy keeping the game closed.
  • When we go to church, I only take three or four games with me. As apart of our Sunday morning routine, I go grab a couple games and stick them in my son's sacrament bag.
  • Sticky velcro circle are just fine to use as your pieces. I was really worried that they would be too loud during sacrament meeting. I now know from experience, it's not.
This is a simple, quick and fun way to make quiet games for your kids to play during church. Plus, you can color in the pages any down time you have. Just remember to have fun! It doesn't have to be perfect, your kids will play with them no matter what!

giveaways

Tuesday, April 13, 2010

Past Craft: Pin the Tag on the Missionary

Sorry about the gap of posts, we had a string of visitors and now our house has been contaminated with sickness. I probably should be sleeping, but I wanted to free myself of the crafting guilt and post a project. :)

I have been crafting in my long absence, so stay tuned. I'm also slowly but surely getting the courage again to think about quiet book which means a post on tips for you and some templates.

Onto the craft!

At church last year, I served as a Primary teacher up until my daughter's birth. One of the lessons was one missionary work, so I wanted to find a cool activity to do with my class (11 year olds). I had an idea for a fun game: Pin the Tag on the Missionary, so I found a drawing of a missionary (sorry I don't remember where I got it) and started from there.
How to play:
Players earn elder tags by doing the activity or answering the question on opposite side. Once all Elder tags are divided then play as 'Pin the Tail on the Donkey.' Player closest to the tag box is the winner

How to Make Your Own:
Supplies:
scrapbook paper, construction paper, poster board, black cardstock, favorite adhesive, a marker, laminator (or access to a local FedEx Kinkos), list of activities (see end of post for ideas)
  1. Cut the posterboard to 11 inches by 14 inches. I did this because I didn't want to carry a huge game around and I wanted it to fit in the laminator.
  2. Design your missionary. Basically, I found a drawn picture of a missionary, printed him off and cut him apart to use as templates for my missionary. I also used my creative license to add a Book of Mormon. Don't forget to draw a tag box on your missionary. Mine is 2 in by 1 1/4 in.
  3. Glue pieces onto board. Now onto the Elder tags.
  4. Open up a publishing software and create the back of the tags. I made 24 2in. x1 1/4 in. text boxes in one document in Word. In each box I have an activity to act out or a question to answer. Print and cut out.
  5. Using your black cardstock, cut out 24 2.5 in by 1.75 rectangles. On one side, write the word 'Elder.' Glue an activity box to the other.
  6. Now you're ready to laminate and play!
My class ended up having a lot of fun playing the game and now it's stored away for when our kids get older.

NOTE: In my sick haze, I can't quite figure out how to upload my 'tags' document, so I'll give ya'll the next best thing, my ideas:

Things to act out:
reading the scriptures, introducing yourself to others, tie a tie, fixing a tire on your bike, riding a bike, cooking a meal, knocking on doors, sewing a button, writing a letter, saving money, ironing a shirt/blouse

Questions:
Talk about your favorite Church hymn/song.
Tell something you can do to help your testimony grow.
Give someone a sincere complement.
Who is your favorite person from the scriptures? Why?
Share what you could write in a BoM to give to a friend.
Tell why you appreciate Jesus Christ.
Name two ways you can set an example.
How could you be a friend to someone who seems to be left out?
Name a Church magazine/book you could share with a friend.
Repeat and/or explain an article of faith.
Name a Church activity you can invite a friend to.
Repeat and/or explain your favorite scripture.
Name two ways you can be kind to others.
Name a Church video you could share with a friend.

Enjoy!

Friday, February 19, 2010

Dress-Up Tie: For Big-Headed Boys

Sorry about my absence, my little girl was blessed this past weekend and I had a lot of family in town. Since she was blessed, I wanted the rest of the family to look nice too, so what does that mean for Daddy & Toddler? Matching Ties!!!

I didn't have time to visit {this marvelous shop}, so I used THIS tutorial to make my son's tie. I was very excited until I went to have him try it on and I could barely get it over his head AND once it was over his head, it was too big around his neck. For a few minutes I wondered how I would fix this...then three words popped into my head: Sew-On Snaps.

To do this you'll need: a tie, matching embroidery floss, needle, two Sew-On Snaps (size 1)
  1. Follow the elastic-type tutorial, until you measure your little stud's neck. Then do this:
  2. Take the measurement and add an inch to the neck loop of the tie. Then, cut in the middle of the loop.
  3. Blanket stitch the new edges so they won't fray too bad.
  4. On the edge, about an half-inch in, sew on one side of the snaps. Snap the other half back in as an easy way to match it up on the other side, then sew it on. Repeat with second snap.
You've now created a new tie for your little man!

Linking to:
Market Yourself Mondays at Sumo's Sweet Stuff &
Just Something I Whipped Up at The Girl Creative

Wednesday, February 3, 2010

Valentine's Shirts: Boy & Girl

A couple weeks ago, I made these for my kids:

All I needed was wonderunder, a little bit of fabric, floss, and fabric markers.

His says: Heart breaker-in-trainingHers says: SweetheartI sure L-O-V-E these two!

monogram


giveaways

Monday, February 1, 2010

Alphabet Magnets

First, off, we hope you like the make-over! It was about time! What do ya'll think? I got all the elements as freebies from Digi-Scrap Depot---love them! Don't forget to Grab our Button and become a follower! Now--- onto the Alphabet!

I finally finished a Christmas present to my kids this past week. ALPHABET MAGNETS!What you need:
  • 6 pages of felt
  • Embroidery Floss
  • Needle
  • Basic knowledge of blanket stitch (great tutorial HERE)
  • Small baggie of poly-fil
  • Glue Gun & Sticks
  • 3/4 in magnets
DISCLAIMER: When using the finished product, remember, if the magnets are removed from the felt they could be a choking hazard. As with all toys, supervise your children! :)

Here's what you do:
1. First find a font you like and type up the alphabet. I used Grilled Cheese sized 250.
2. Cut out the letters and use them as a guide to cut out on felt. I just held the letters in place, as to save time from tracing onto the felt. (NOTE: I cut out enough multiples of letters for my kids to spell their names i.e. Bob needs two B's instead of one).3. Use the floss to blanket stitch around each letter. Sounds simple, but it's time consuming. Just take the letters with you whereever you go. Save yourself a little hole to stuff in some poly-fil; stuff and sew the hole closed. Repeat with all letters.
4. Use glue gun to attach one magnet to the back of each letter. Repeat with all letters.
5. Put on fridge or other magnetic surface for child to find after nap. Watch and Enjoy!

Thursday, October 22, 2009

Gospel Quiet Book

Don't forget to follow us, if you haven't already!!! My next few posts are not new crafts, but things I did right before we moved into our house (hence the reason for the lack of posting).

Now that I've finally mailed the second book, I have no hesitation in posting the page pictures.

The only template I used was for Joseph's coat (found here); every other page is a Ambo creation. So, if you happen to enjoy the pages and use them as inspiration, please link here and give credit.

After baby girl's birth, I just might make templates, if there is a big enough demand and we somehow get more readers...

Picture 1: Noah's Ark--fill with animal finger puppets, Tree of Life--sliding people & snapable fruit, Pioneer Wagon--lace cover & attach wheels, Temple Puzzle Page---build temples, & Time for Tithing--pay tithing with envelope and slip inside
Picture 2: Joseph's Coat--colors snap on and off, Jaredites' Journey--boats unbutton from glowing stones, Singing Voices--felt note and beads slide, Puzzle Storage--for temples, & My Scripture Case--pack scriptures for Sunday, can even put real pencil and paper for drawingPicture 3: Temple Puzzles for puzzle page
I made these all for a friend and, after taking a long, much needed quiet book break, I will have no choice but to fulfill the urge to make some for my own children. :)

Monday, October 12, 2009

Freezer Paper Stenciling

I discovered this a few months ago and did a bunch for both my Knight and future Princess.Since it's really easy, it's really really addictive! All you need is a shirt, Freezer Paper (I only found it at Wal-Mart), acrylic or fabric paint, exacto knife, brush, iron and an idea. The possibilities are endless.

Draw your own design out on the paper, print it out (after cutting it to fit your printer), or trace it onto the smooth side of the paper. Cut it out with the exacto knife (cut out the small pieces first). Then iron it onto the shirt with a full piece of paper also on the other side. Paint the design, wait for it to dry, then take off the stencil. Last but not least, iron one more piece of paper over the design to heat seal it. Wait for it to cool down and TA-DA!!! A new shirt for your child!!!

Last week, I made this Halloween shirt for Little Knight.
Isn't he cute?!?!

Friday, October 2, 2009

My First Quiet Book

About a month ago, I spent two weeks of my extra time sewing, hand-sewing, ironing, cutting, cursing felt and a missing zipper foot, I did what I set out to do--- I made a quiet book for our kids.

It's not perfect, but I made it and that makes it all worth it.

I used a lot of resources, most stemming from the blog: How to Make a Quiet Book. I changed a bunch of things to my liking, however, I recommend this site for anyone who is silly enough to attempt their own.

I just recently finished a gospel-themed Quiet Book (yes, two in two months and my husband and child are still alive) for my best friend's daughter, but I'm not posting that until I send it off... so stay tuned!

I'll expound on them at a later date, maybe even throw in a couple of templates (especially the gospel one because it's more of my brain-child), but, for now, I have a few other things I want to accomplish while my son attempts to sleep... we're having a rough day.

Here are the pages:

All of them pre-sewing binding

The finished numbers page (props to my husband and his mad knot-tying skills or this page would still be unfinished)